When your program receives a referral, your team takes various actions to help the person seeking services (Seeker). If you want to log, track, and report on these activities, you can use Data Collection Forms.
Why use Data Collection Forms?
-
Track Member Trends: Better understand the specific ways you assist your members and identify patterns in how they use your services.
-
Prove Your Impact: Easily gather the precise data you need to report back to funders, stakeholders, or leadership.
-
Streamline Reporting: Keep all your program activity data in one centralized place, making it simple to pull insights whenever you need them.
How It Works
1. Customize Your Forms
Programs have total control over what they track. You can set up your own custom forms featuring the exact data points and questions your organization needs to collect.
2. Log Data on the Go
Once your forms are set up, your team can easily access and fill them out directly from the Inbound Referrals Dashboard while working with a Seeker.
3. Automatically Save and Analyze
-
On the Seeker Profile: Every submitted form is automatically saved to the specific Seeker’s Profile, giving your team a permanent, centralized history of care.
-
In the Analytics Dashboard: All submitted data flows directly into the Data Collection Analytics Dashboard, making it easy to run reports and view high-level trends at a glance.
💡 Tip: Data Collection Forms are the best way to turn your day-to-day helpful actions into measurable, reportable success stories.
Setting up a Data Collection Form
From the Inbound Referrals Dashboard, locate the Settings dropdown.
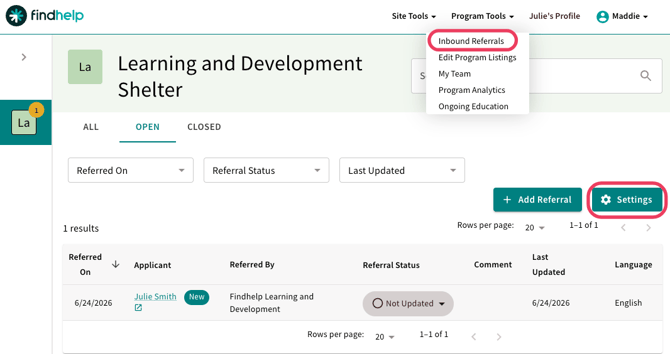
Select New Internal Data Collection Form. Once set up, you can edit your form in the same place.
.png?width=345&height=194&name=Zight%202026-6-24%20at%209.22.29%20AM%20(1).png)
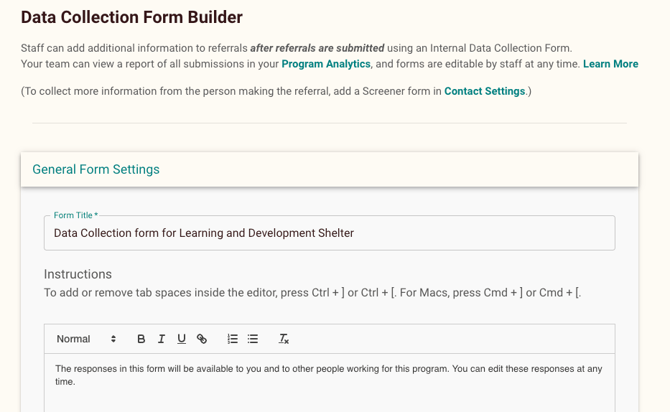
Name your Data Collection Form and add instructions for your program staff who will be using the form.
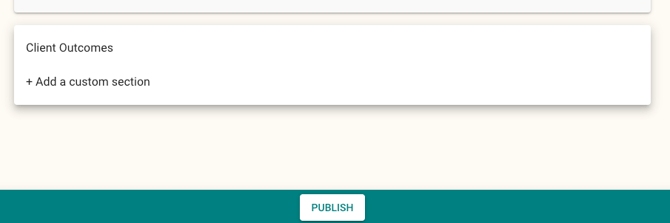
Click Add Section to add new fields. Choose from our standard section templates or build your own custom section."
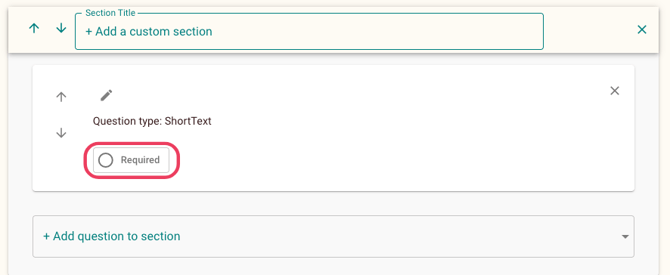
After creating a section, you can add questions. If using a standard section, you can quickly add pre-made standard questions. You can also build custom questions from scratch.
Use the Question Type dropdown menu to choose your format (e.g., long answer, radio buttons, or checkboxes).
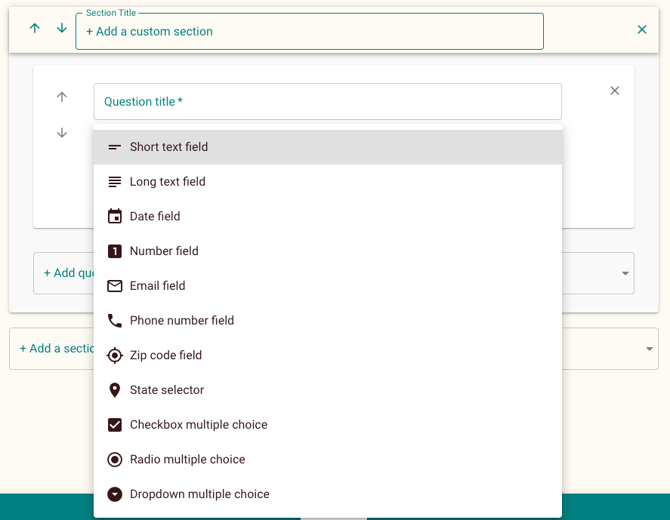
Check the Required box if the question must be answered before submission
Editing a Data Collection Form
You can modify the layout and content of your forms at any time using the following controls:
-
Rearrange the Layout: Use the up and down arrows on any section or question to move it to a different position on the form.
-
Make Changes: Click the pencil icon next to any section, question, question type, answer choice, or eligibility rule to edit it.
Important! Rules for Editing Existing Forms
Before making changes to a Data Collection Form that is already live, please keep the following in mind:
1. Unsubmitted Forms: Any edits, additions, or removals you make will apply instantly to all forms that are currently in progress or unsubmitted.
2. Deleted Questions: If you delete a question, it will no longer appear on previously submitted forms.
3. Historical Data is Safe: Don't worry—any data that was already submitted before the question was deleted will still be saved and visible in your Analytics Dashboard.
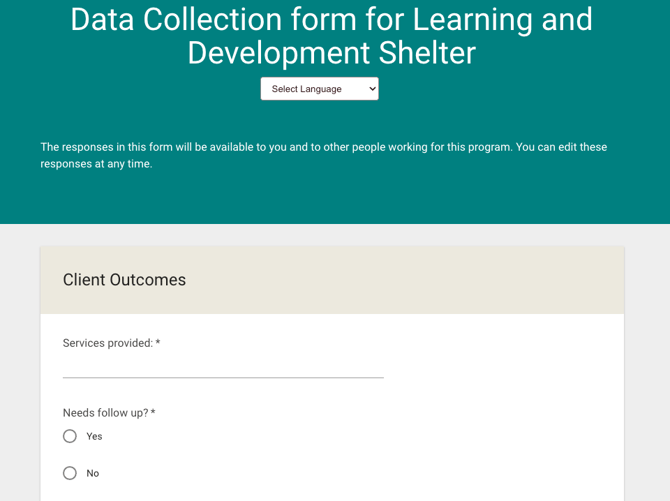
Filling Out Data Collection Forms
Once a form is set up, it is automatically associated with the referrals your program receives. You and any other program claimers on your program can access and fill out these forms directly from the Inbound Referrals Dashboard.
Step 1: Go to your Inbound Referrals Dashboard and locate the Forms column. Click on the specific Data Collection Form you want to fill out.

Step 2: Complete the fields in the form.
Step 3: Choose whether to save your progress or submit the final form:
-
Save Draft: Use this option if you need to pause and finish later. It saves your current progress—even if mandatory fields are left blank—so you can return to it at any time.
-
Review and Submit: Click this when the form is complete. Note: All mandatory fields must be filled out before you can successfully submit.
What Happens After Submission?
Once a form is submitted, it is finalized and automatically syncs across your account:
-
Seeker Profile: The completed form will instantly appear under the Forms section of the Seeker's Profile for easy tracking.
-
Printable Copy: A version of the completed form will be available for you to print if needed.
-
Analytics: The detailed form responses will immediately flow into your Analytics dashboard for reporting and trend tracking.